
Did you know that glass is both a liquid and a solid? Yup. Molecularly, it’s both! And to make glass, you just need sand, liquid sand. If you heat sand hot enough, it melts, turns clear and cools into glass. So when you are holding a glass jar, you’re basically holding the beach…which is kind of awesome, but before you stress…hakuna matata…even on a blazing hot day, your beach can’t go rogue. The temp needs to be at least 3,000 degrees Fahrenheit to melt. Glass really just makes for a great bottle too, and the Boston Round is a very common and popular shape that works for many products. If you’re using or considering a Boston Round, we’ll show you how to label it best.
Pros of the Boston Round
Boston Rounds have a standard shape. The bottle’s shape has a thin neck and opening which works really well with lotion pumps, screw caps, droppers and spray heads.
The size options are pretty endless as well, from tiny essential oil sizes all the way up to giant kombucha drinking sizes.
The jars themselves usually come in plastic and more recognizably, a green, amber, or cobalt blue glass which give your product a natural vibe or an old school apothecary flair. The bonus of a darker glass is that it protects your product from the sunlight.
How to label the Boston Round
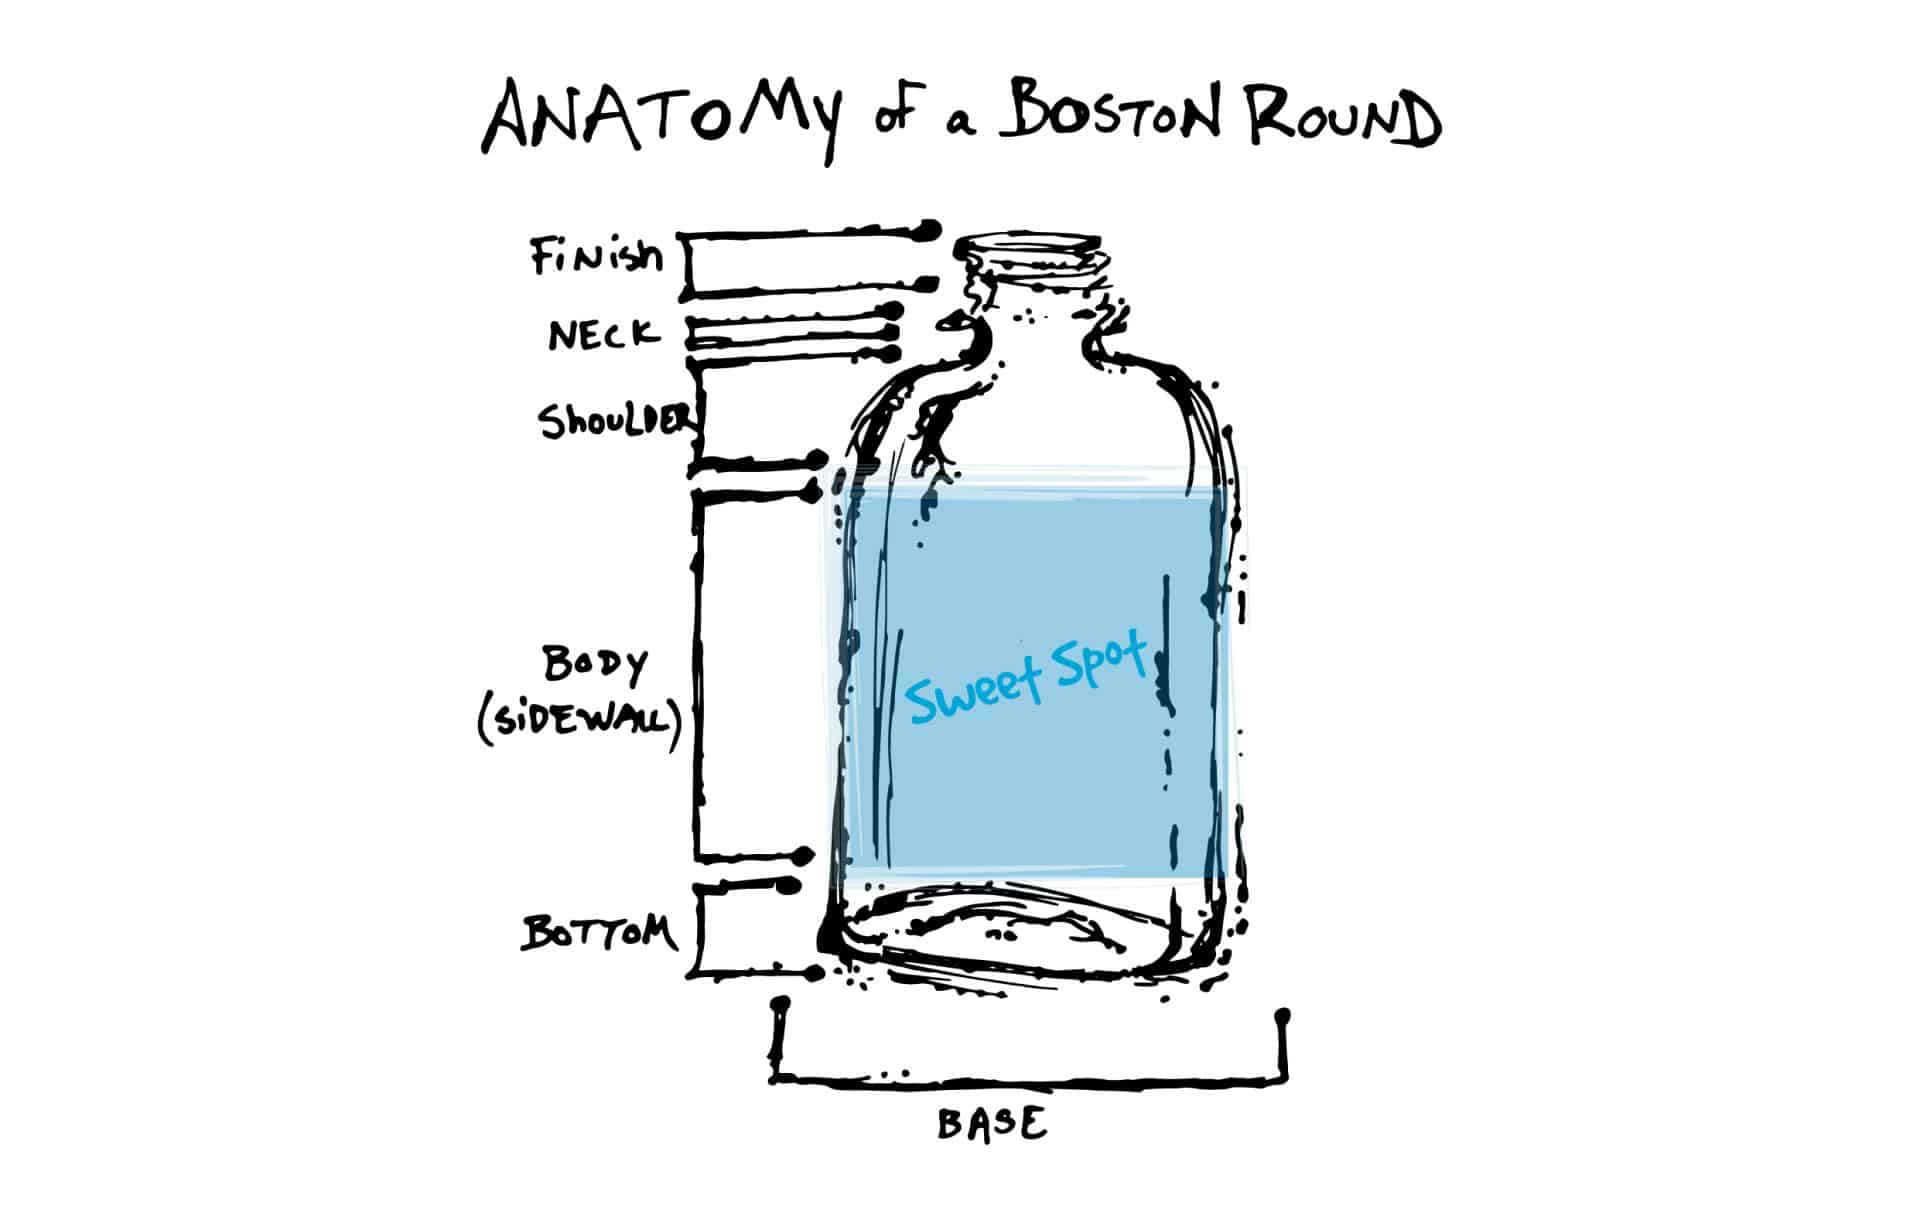
A great question that comes up a lot is “What size label do I need for my bottle?” The standard shape of the Boston Round makes it little easier across the board to know what size label you’ll need for it. Basically, the Boston Round has a sweet spot. In the diagram of the Boston’s anatomy, keep in mind two main areas, the shoulder and the bottom. The shoulder area is uneven and begins to curve. This is true of the bottom too, although it’s a little more subtle. If a label is applied (even partially) on either of these areas, it will not adhere fully, popping up as the jar begins to curve. This might feel like common sense, but steering clear of the shoulder and bottom will help ensure your label adheres strongly and lays flat.
Pro tip: For starters, simply measure from the shoulder to the bottom of the jar. Subtract a quarter to half an inch or more on each end (depending on the size of your Boston round). This will give you an approximate place to play. Time to start designing that label!
The sweet spot is in the middle. This is your area to label. Whether you go with a rectangle, square, circle, oval, or custom label, the sweet spot is your area to play. Depending on the size of your jar, the area will vary, so just measure that space between the shoulder and the bottom. Since these bottles, no matter the size, all have the same shape, you’ll have a key to finding that perfect label size.
Knowledge Drop! Our labels adhere best to clean, flat, hard, dry surfaces.
We are here to help if you have any questions on finding that perfect size label for your jar or product. Our customer experience team is top-notch.


