
Straight lines and right angles certainly have their place in product packaging, but curved and tapered bottles, cans, and containers are a must for many product types. Designing curved or tapered labels for your products is simple if you know the process to use. In this post, we’ll share step-by-step instructions to ensure the taper and curves of your product label line up perfectly with your product packaging.
Why Curved and Tapered Labels Are Important
Using a square or rectangular label on a surface that’s tapered won’t work. Even the slightest taper to a product’s packaging can cause significant issues when labeled. If a label doesn’t have a taper or curve to match the contours of the bottle or container it’s being applied to, the label will crease or fold in the wrong places, making the label look wrinkled.
In addition, a product label that’s not tapered correctly will result in the label appearing crooked or not completely covering the area it was intended to. Curved or tapered labels are specifically designed to align with the unique shape of the product packaging. So when they’re applied, they lay flat and fit perfectly.
Designing Tapered and Curved Labels
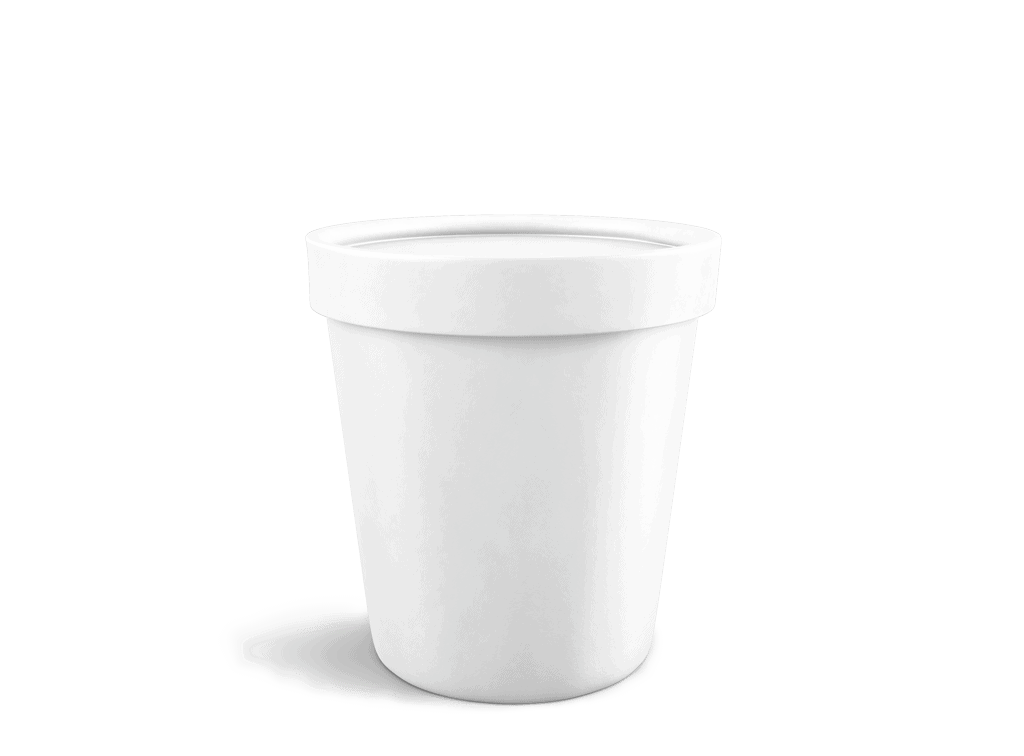
Whether you’re using a curved label template or custom designing a tapered label, following the steps below will ensure you know how to design and apply a label to a tapered surface. Note that we’ll be using an ice cream pint as an example, and the good news is that we’ve got several ice cream pint label sizes already compiled if you’d like to skip the hard work!
Step 1: Determine Where Your Tapered Label Should Go
Before you begin, you’ll need to define basic parameters. First, decide what type of coverage you need. Is the label going to be a full or half wrap? What real estate should it occupy on your product packaging?
Step 2: Mark Out and Measure Your Tapered Label
After you’ve settled on placement, it’s time to take some measurements. Use a fabric tape measure or paper ruler as these will easily bend to the contour of the container and yield the most accurate measurements. A paper ruler is especially helpful because you can mark each length on the ruler using a different color (for example: blue for the top length, green for the bottom length, and yellow for the height). If you’re going with a full wrap label, you’ll need to take the measurements of the top and bottom circumferences of the packaging.

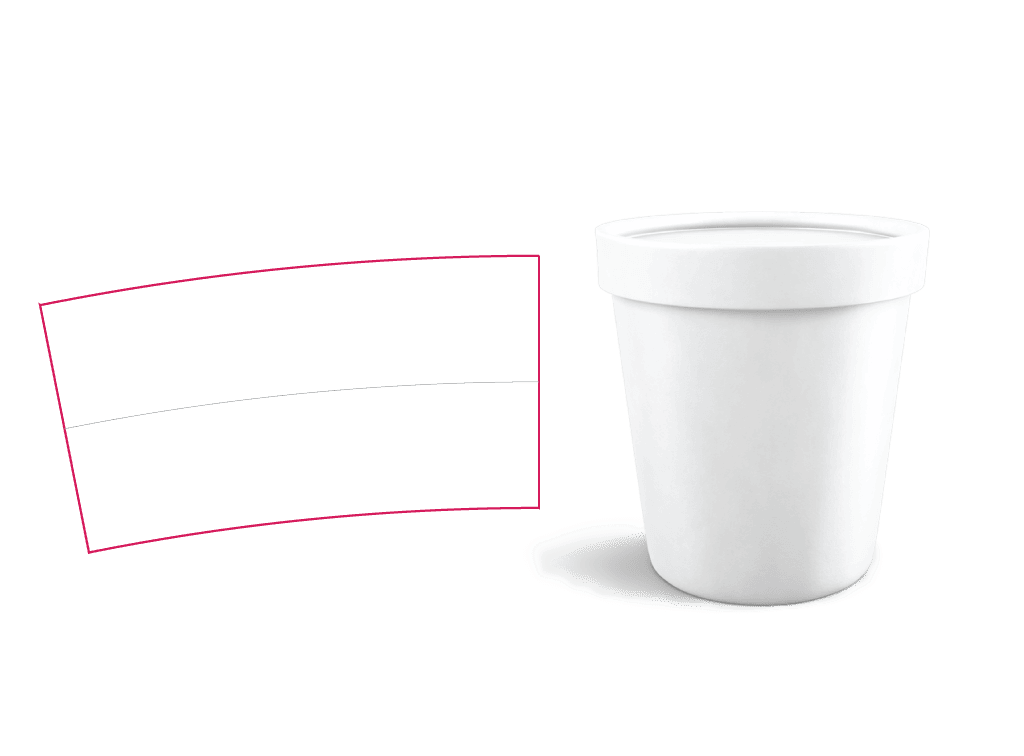
Step 3: Master the Geometry
Now it’s time to head back to high school for a quick geometry calculation. The good news is that this online template generator will do the heavy lifting for you. Before you plug in the top and bottom diameters, divide each measurement by 3.14 (or pi, as it’s commonly known.) Then, plug in all numbers in the corresponding sections. Under the optional parameters, enter in “0” for both Glue Flap Angle and Glue Flap Size. (You won’t need these.) Make sure to select “Fit page to drawing” for Page Size, then hit “Create” to generate your tapered label dieline template.
Print the dieline template at 100% scale (or Do Not Scale) to make sure the curvature works. You might need to make some adjustments if you don’t like the way the edges overlap, but the template should be near perfect.
Step 4: Find the Perfect Curve
With your template ready, it’s time to bend your graphic design to fit your label. First, make sure you add bleed by extending the background pattern or colors 0.0625” beyond the final label size on every side. This will ensure your finished labels don’t have any unwanted empty space at the edges.
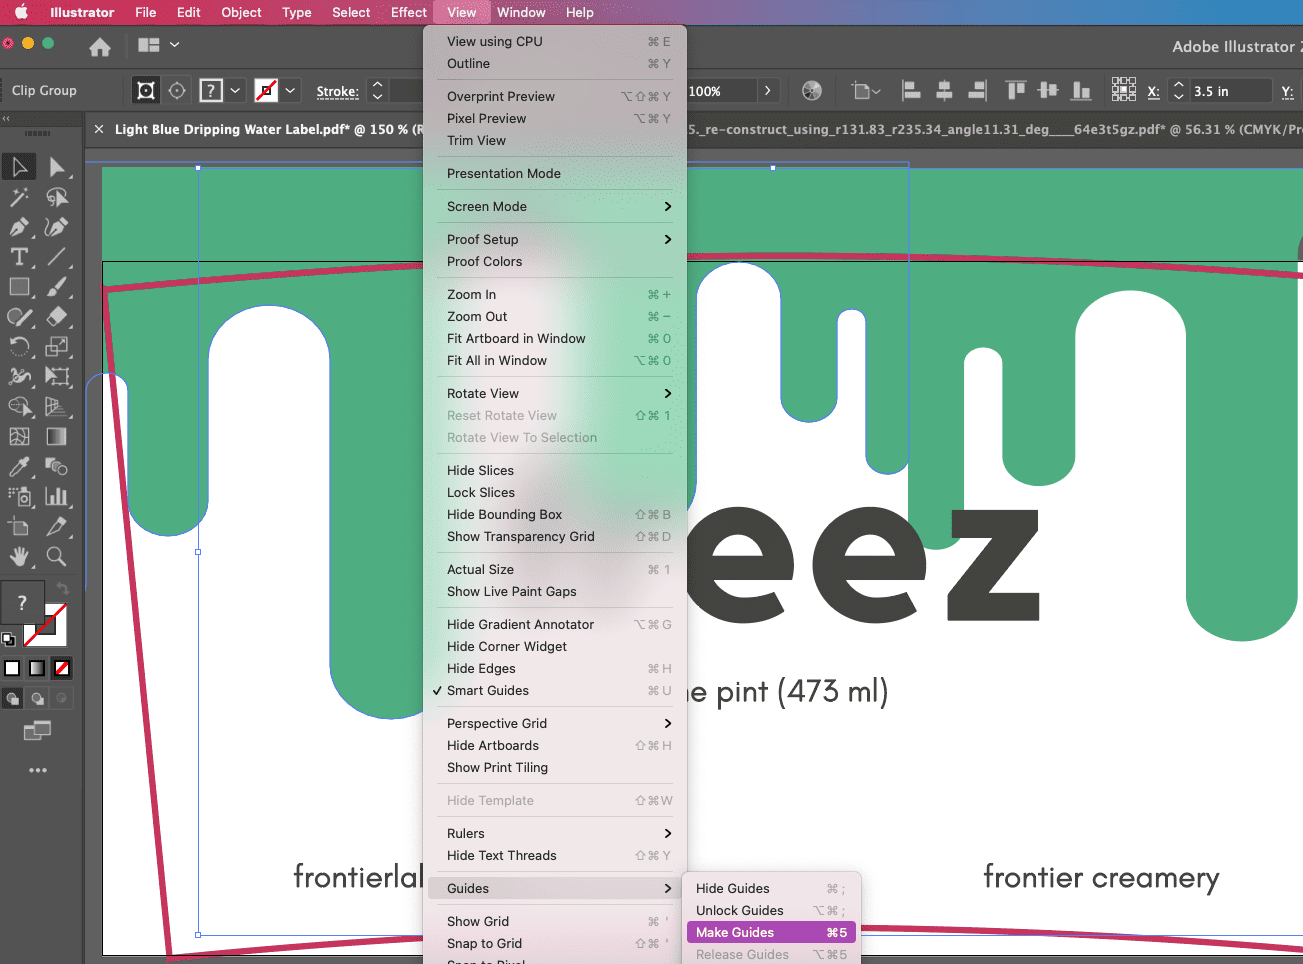
Next, open your label design in Illustrator, select all elements (Select > All), and then group them together (Object > Group).


Paste the template you generated into the same file and center it over your artwork. This may take some troubleshooting. Once you have it centered, convert it to a guide (View > Guides > Make Guides).
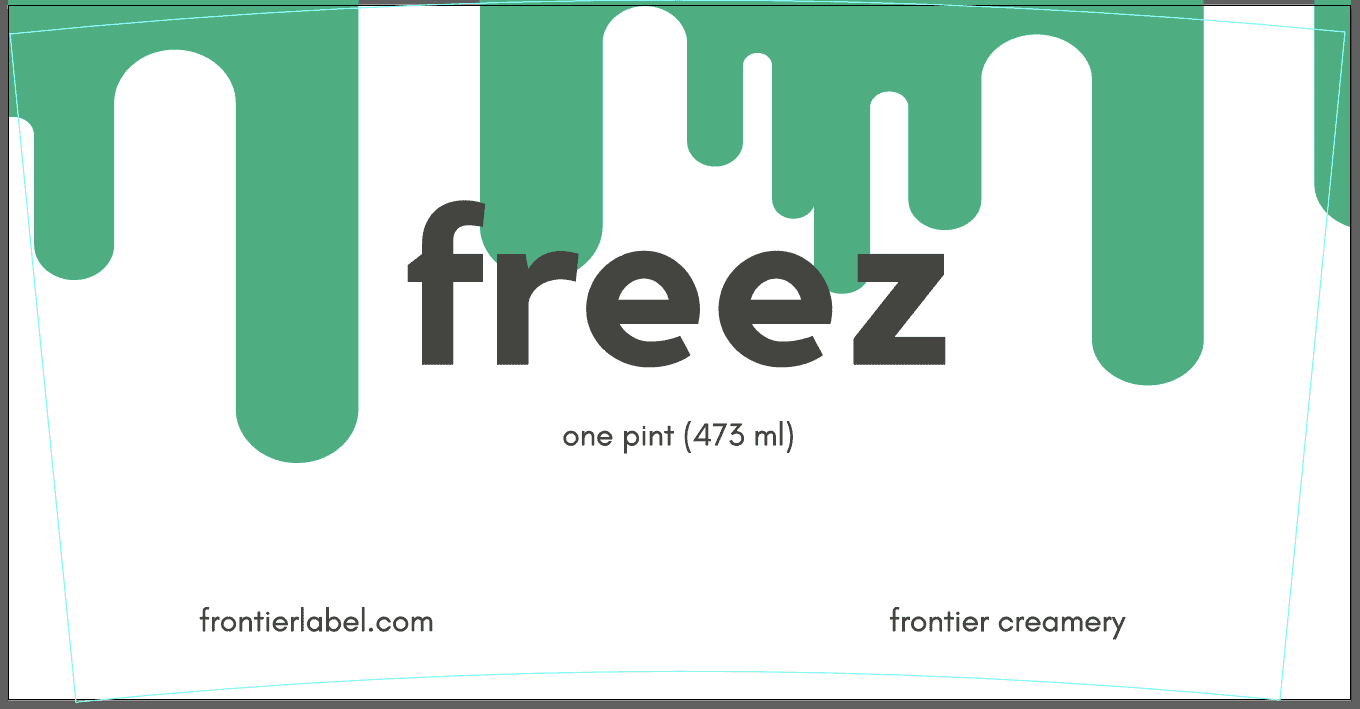
Select your artwork again and create an arc (Effect > Warp > Arc). Start small with only a 1-2% arc and work your way up from there. Make sure you have Preview on so you can see your artwork change in real time. You may need to adjust the placement once more after it’s warped so it fits perfectly within the new template. After that, you should be good to go!

Experience Makes the Difference in Quality Tapered or Curved Labels
If you’re not skilled in graphic design or you’re unsure about your results, you may want to work with a product label company like ours that offers custom label design services. Leaving your labeling to the pros will ensure you have a perfect fit with the design you envision. We specialize in designing and printing custom labels for a variety of surfaces, including curved and tapered ones. We can design and print labels of any shape or size using a wide range of materials.
If you have any questions about label selection or printing, don’t hesitate to contact our Customer Care Team today. Our team is ready to serve your business with care and excellence.
You might also like:
- 5 Types of Labels for Glass Bottles and Jars
- Guidelines for Small Text on Custom Labels
- How to Determine Your Label Roll Direction
Sttark updated this page on August 10th, 2023. All information is up to date.


